|
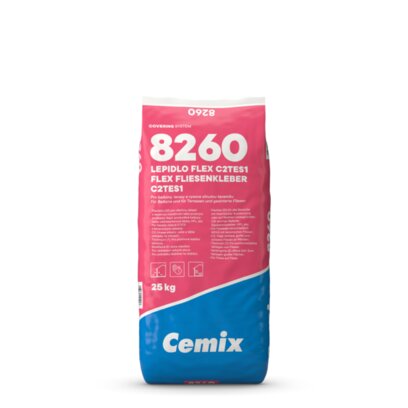
8260
TILE ADHESIVE FLEX C2TES1
Formerly 045
Resists heat and cold
Flexible to compensate thermal expansion
- S1 Flex: For areas with highest temperature changes, e.g. sunny balconies. Equalizes tensions caused of heat expansion.
- Also for flexible substrates e.g. HPL boards. For ETICS using ceramic tiles on the facade.
- C2: Carries mid, large and heavy tiles on walls.
- High adhesion: For sintered and low water absorbent tiles.
- Tixotroph (T): For reduced slip. Makes position stable tiling on walls easy.
- Extented (E) open time: Allows tiling of large areas in one step.
- For tile-on-tile.
- For installing decorative facings made of light concrete or bricks.
- Suitable for garages with traffic loads up to 3,5to.
Area of application
- Outdoor: floor + wall
- Indoor: floor + wall
- For humid areas
- Frost resistant
Heating and cooling area
- Floor + Wall
Processing method
- For hand processing
- For all types of ceramic materials, even extremely low-absorbent tiles (group BIa).
- For areas with high thermal expansion due to highest temperature changes , e.g. sunny balconies, terraces.
- Suitable for flexible substrates e.g. old tiles, HPL boards.
- Suitable for areas with traffic loads up to 3,5to: car, forklift.
Price list
Code
Packaging
Code
Packaging
25 kg
Processing details
Learn more about technical details for processing this product.
Substrate requirement
The substrate must comply with the applicable standards, must be solid, free of loose particles, free of dust, paint, residues of demoulding agents and efflorescence. It must be sufficiently rough, dry and evenly absorbent. The surface shall not be frozen or water-repellent. The substrate shall be stable in volume and have required flatness.
Substrate preparation
Depending on substrate water absorption and climatic conditions, the following is needed: Use Cemix 2614 primer on absorbent substrates, roughen smooth substrates or use Cemix 8040 contact bridge. For non-standard substrates, modify with a suitable method to achieve the desired properties. Smooth unevenness of substrate with suitable Cemix materials and allow to dry and cure. The substrate shall comply with applicable codes, standards, or material manufacturer's recommendations.
Preparation of the mixture
Prepare the material by pouring the dry mixture into the prescribed amount of water and mixing it. Use potable water or water complying with EN 1008 to mix the mixture. Mix using a slow-speed mixer. Mix to a homogeneous, lump-free mixture and leave to rest. Then mix again briefly.
Water demand

| Quantity | Liters (Min) | Liters (Max) |
|---|---|---|
| 25 kg | 6.5 L | 7.5 L |
| 1 kg | 0.26 L | 0.3 L |
Mixing


Processing instructions
First, apply a thin layer of the adhesive to the substrate with the straight edge of the stainless steel trowel. Then, apply sufficient adhesive for the appropriate layer with the notched side of the trowel, if possible in one direction.
Lay the tiles and adjust them within the open time period.
In case the open time is exceeded, do not tile anymore. The applied adhesive must be removed in this case.
In case of uneven substrates use buttering floating process : Apply adhesive as described also on the reverse side of the tile.
Clean the tile from fresh adhesive with a sponge trowel and clean water.
Application thickness

| Minimum layer thickness | 3 mm |
|---|---|
| Recommended layer thickness | 6 mm |
| Maximum layer thickness | 12 mm |
Consumption

Open time according to EN12004

>30 min
Working time (potlife)

180 min
Walkability after

48 h
Treatment after application
Non-absorbent tiles prolong the curing period.
Avoid sun, heat, humidity and draughts. Protect from frost. Direct heating of the surface is not permitted.
Tool and cleaning instructions
After finishing work, wash the tools immediately with clean water. Remove dried residues mechanically.
Smaller deposits can be removed with acetic (diluted acetic acid) or a special cement paint cleaner.
References
Technical parameters
| Main binder | Grey cement |
| Flammability class |
A1, A1fl |
| Max. grain size | 0,7mm |
| Full load after | 7 d |
| Adhesive tensile strength after water storage in >N/mm²(EN12004) | 1 |
| Adhesive tensile strength after warm storage in >N/mm² (EN12004) | 1 |
| Adhesion tensile strength after freeze thaw storage in >N/mm² | 1 |
| Adhesive tensile strength after dry storage in >N/mm² (EN12004) | 1 |
| Setting time and tensile adhesion after 30 min | 0.5 |
| Vertical slip (EN12004) | 0.5 mm |
| Transverse deformation | S1 |
Files
|
|
